Are you thinking about an aluminum extrusion to solve a problem or create a product? If you’ve never designed one before this blog is for you. Profile Precision Extrusions has worked with hundreds of customers who are new to designing aluminum extrusions. We’ll be happy to guide you through the process of designing an extruded shape or aluminum tube, in five easy steps.
Step 1: Design
Sketch out your ideal extrusion. The sketch can be on a napkin, notepad or Solidworks file. All of the parts we produce must fit inside a 4 inch diameter circle. Identify the two or three most important dimensions or features of the design. Some other details to think about are:
- The alloy and temper you’d like
- Surfaces that are important cosmetically
- How long each extrusion needs to be
- How many pieces you’d like to purchase
- We provide free samples with every new die order
- We don’t have a minimum order size!
It’s ok if you don’t know the answers to the above questions, we can discuss them with you and make recommendations based on our experience and expertise.
Step 2: Feedback
Once we receive your design, our Inside Sales Representatives will review it. With their experience they can offer you feedback the same day in many cases. For more complex or intricate designs they may ask for feedback from our production team or tooling vendors. Their feedback and response times generally run 24 – 48 hours. It is not unusual for the design, feedback, and re-design process to have one or two iterations.
One we have settled on a design you are pleased with, and one we can produce, we’ll discuss other important details from the design phase. These details might include cutting to length, machining or anodizing. Next we will price out your extrusion, and how long it will take for us to deliver your first order.
Step 3: Build Die
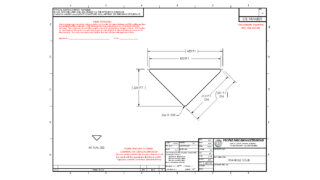
When you decide to move ahead with your project, an extrusion die has to be ordered. The first step is to take your design and create an extrusion print. Our Application Engineer will create a Solidworks file of your design. An approval print will be sent to you and we ask you review all the details. Once you approve the print we will order the extrusion die from our die maker. The die maker will machine H13 tool steel to create the extrusion die. Current lead times to build a die are four weeks for a solid design and five weeks for a hollow design.
Step 4: Extrude Samples (die trial)
When the die is received from the die maker, our Tooling Manager will inspect it to make sure it was made to the specifications the tool maker was given. The die is then approved for a die trial. A die trial is a short sample run to confirm the die and our production plan will result in the aluminum extrusion you envisioned.
For the trial the die is heated to 850 degrees and placed into the extrusion press. The aluminum billet is heated to 940 degrees and placed into the extrusion press behind the die. The ram then pushes the billet forward and the aluminum flows through the extrusion die. The extrusion exits the press at close to 1000 degrees fahrenheit. The extrusion is cooled to 350 degrees by fans, a water mist, or water bath. The extrusion is then transferred to a cooling table. Once cool to the touch, the extrusion is stretched to make sure it is straight. To create the desired temper, the extrusion is placed inside an aging oven and heated to 325 degrees for eight hours.
Step 5: Send your samples
Once tempered, the aluminum extrusion is cut to length. Samples are sent to you to evaluate and for your use in creating your prototypes.
Profile Precision Extrusions always provides samples free of charge with the purchase of an extrusion die. Also included is a first article inspection report and material certification which confirms all of your specifications have been met. We ship new orders to customers weekly.
Call us today and find out how we can help you lower your overall costs, increase quality, and save time by allowing us to manage the aluminum extrusion process for your next project.


